Setting Up Users on the Website
When logging into your account for the first time you should have set up your yearbook staff from the website homepage “Welcome” popup. But if you have additional late comers to the yearbook project you can follow these steps to add new staff members:
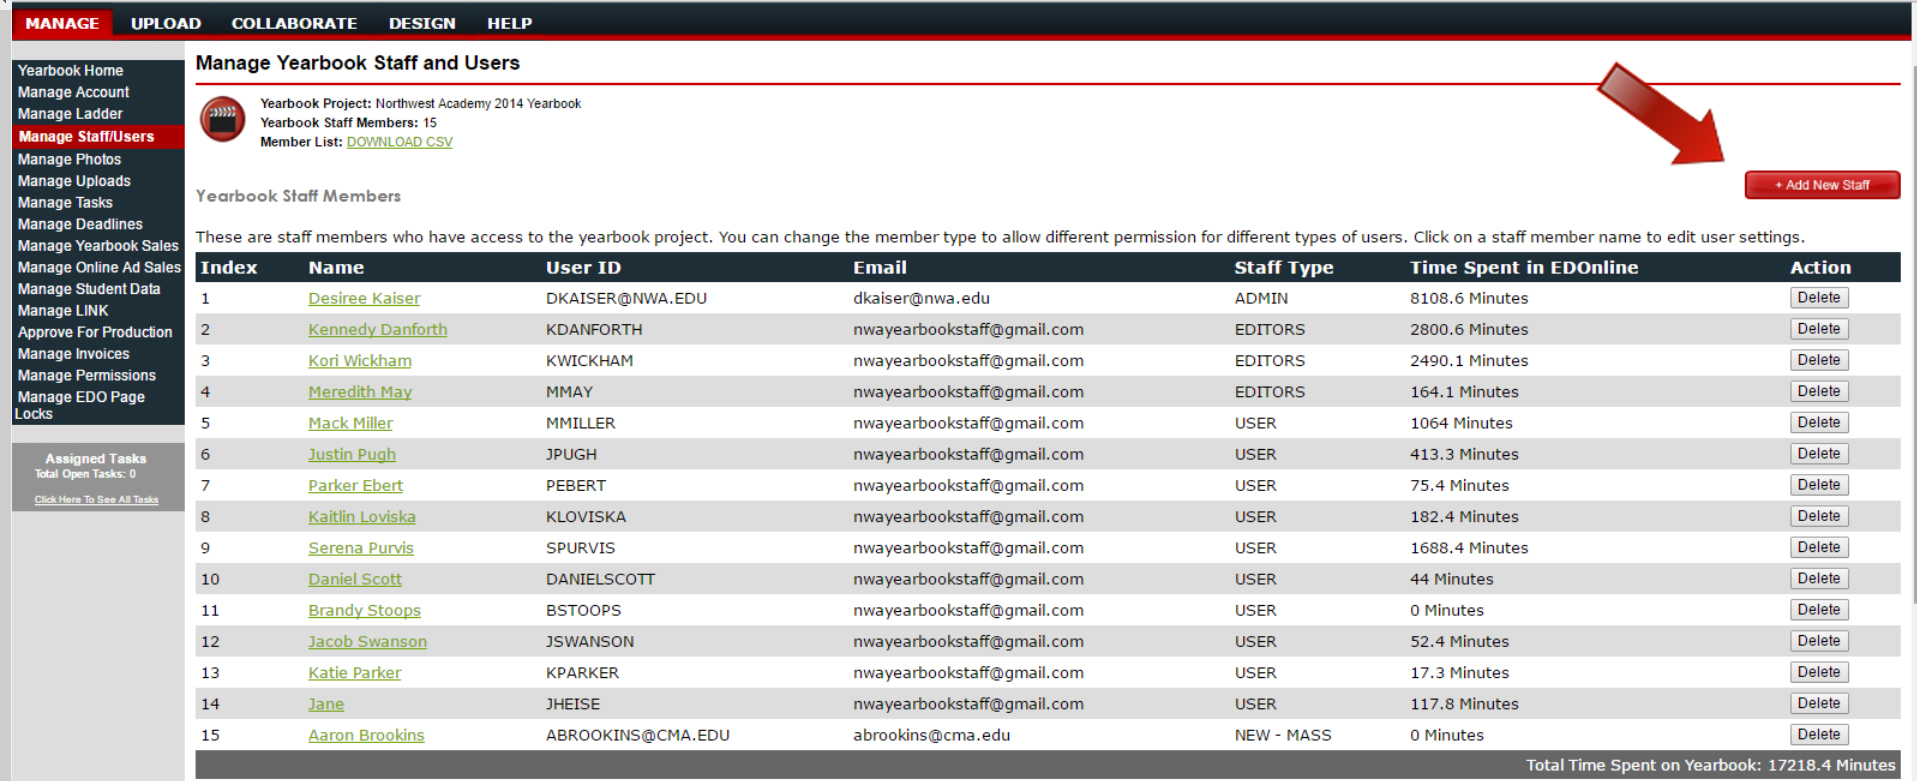
1. Navigate to "Manage Staff/Users" under the Manage Tab.2. To add a User, click on the "+Add New Staff" button.3. Fill in all fields for each member:
- Name: User's full name
- Email: The email address that is associated to the User.
- User ID: Assign a unique name to which identifies the staff member.
- Password: Assign a unique password for your staff member.
- Confirm Password: Re-enter your password again.
- Staff Member Status: Select the status as "Approved User" for your staff member. (Note: If at any time you need to change the status from "Approved" to "Rejected" you can update that status here.)
- Staff Member Type: Select whether the member will be an Administrator, Editor or Staff User.
4. After completing the information on your staff member click "Update Profile."5. Click "Back to Manage Staff" button to add new staff members.
Invite Staff Members:
You may see a list below your current staff users of individuals who have worked on past yearbook projects. They will already have a login set up and you can invite them to work on this year’s project. Simply click on the “Invite” button; an email will be sent to the staff member to work on the yearbook project.

Family/Friends and LINK!
If you have parents, teachers or businesses who want to submit photos and/or ads, they can register a new LINK! account under your school. They will be labeled as a “Mass” user. All mass user logins must be approved before they can be allowed to upload photos and other content to be included in the yearbook. Mass users are not involved in the yearbook creation process at all. They also can't see any photos in the account other than the ones they uploaded. If you wish to allow mass users to submit photos, you must first set up your account to permit this feature:
- After you log in, navigate to "Manage Account".
- Scroll down and select "Manage LINK".
- Check the box that says "Allow LINK! users to upload photos that can be used in the yearbook."
- If you wish to put a password on the account so that only certain people can upload photos, you can do so here. At the top of the section you will see where it says "LINK! Access Password". If you choose to use this option, users will be asked to add a password in LINK! before they can upload photos.
Once your LINK! account options are set up, users can go to link.entourageyearbooks.com and set up an account. Once they are logged in, they just have to search for the school. If you do not have your LINK! account options set up in your account, your school will not show up if anyone searches for it in LINK!. Once they find your school, they will simply click the "Upload photos" button. From there, all they have to do is choose a category and select their files and upload!
Related Articles
Homepage and Tab Navigation
Homepage Welcome all to your yearbook project! I know you’re anxious to get started designing your pages but I would like to take your through the steps of getting your account set up first. This will give you the opportunity to make sure your ...Made by Me - Quick Start Guide
Login to the Website Follow these simple steps to log in to your website: Go to http://yearbooks.spacificnz.com/. You will be taken to the Home Page for all users to gain access to your yearbook site. Click on the link to "Find Your School" Enter the ...Admin Tools
Administrators have full access to all of the features and functions to the yearbook website. You're in the driver's seat leading your yearbook staff in designing a yearbook that you and your school can be proud of. With the many tools to help you ...What are the Current Design Trends and Ideas?
There are a couple of different places where you can find tips on the latest trends YOLO Trend Booklet In your yearbook pack you will find a handy booklet with tips on what's trending in design in the year ahead. This covers design trends, colour ...Using the Yearbook Ladder
When managing your ladder you'll have multiple useful functions to help you detail and organise your pages. You can use it to preview the pagination of your yearbook (order of pages) but you can also organise your yearbook tasks, assign pages to ...