Using the Yearbook Ladder
When managing your ladder you'll have multiple useful functions to help you detail and organise your pages. You can use it to preview the pagination of your yearbook (order of pages) but you can also organise your yearbook tasks, assign pages to staff members, label your pages, and lock/unlock pages as you complete them. To access your yearbook ladder go to the "Manage Tab" and click on "Manage Ladder".
Pagination of Your Yearbook
- At the top - middle of your Yearbook Ladder is your Cover Preview. Utilise one of our newest features by previewing the cover of your finished project. Once your cover is saved you can click on the preview itself to view a dynamic 3D view of the book. Try it out!
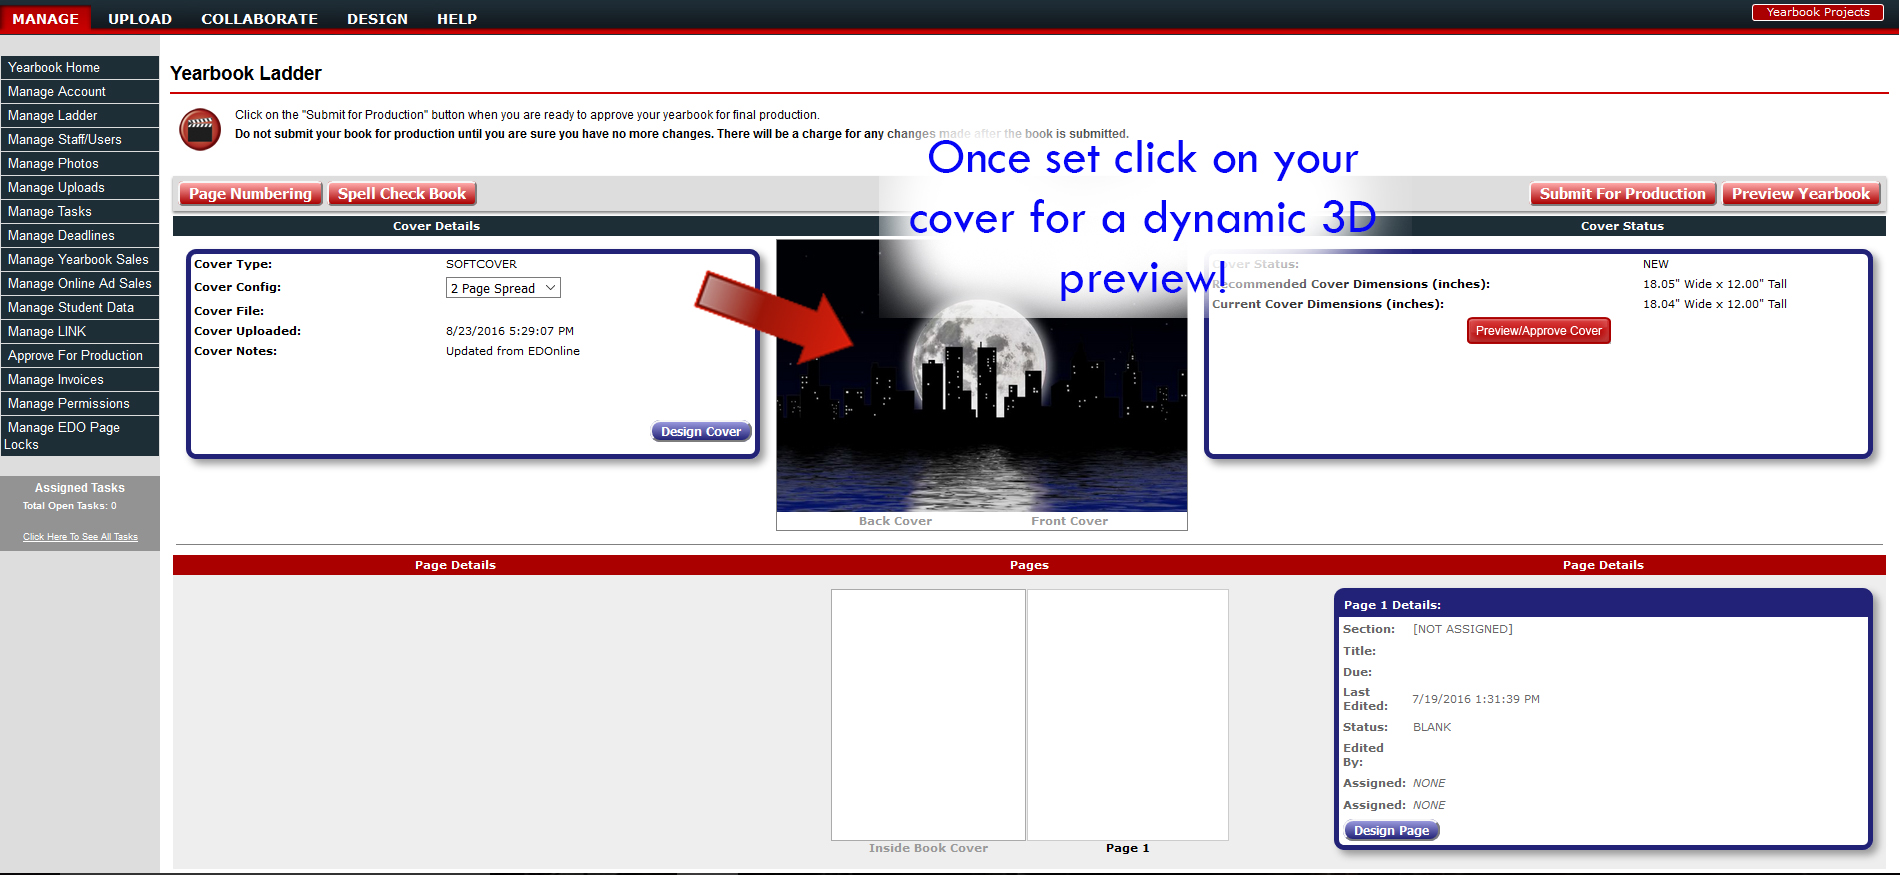
- To view a larger version with the production guides, click on "Preview/Approve Cover" to the right of the preview.
- Use the "Preview/Approve Cover" page to approve your cover if it is finalised and ready for production.
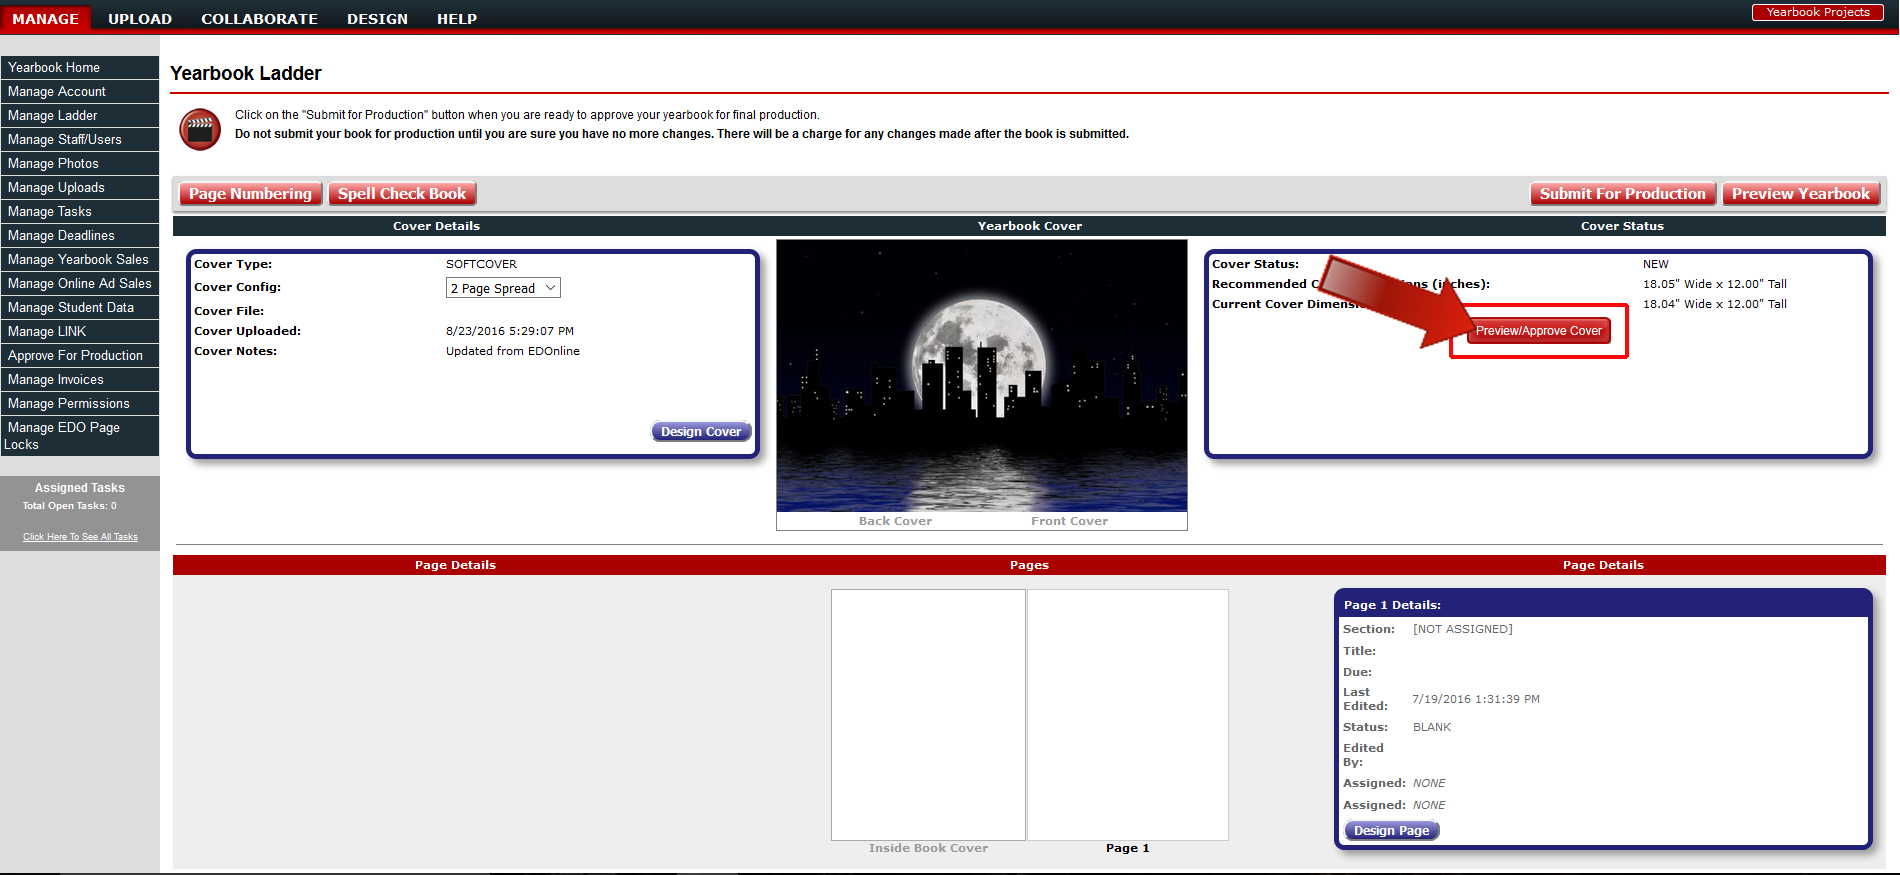
- Below the cover preview, you will see all of your pages listed starting with Page 1 button in the top right.
- By clicking on "Page Numbering" at the top left of your ladder, you can turn your page numbering on and off.
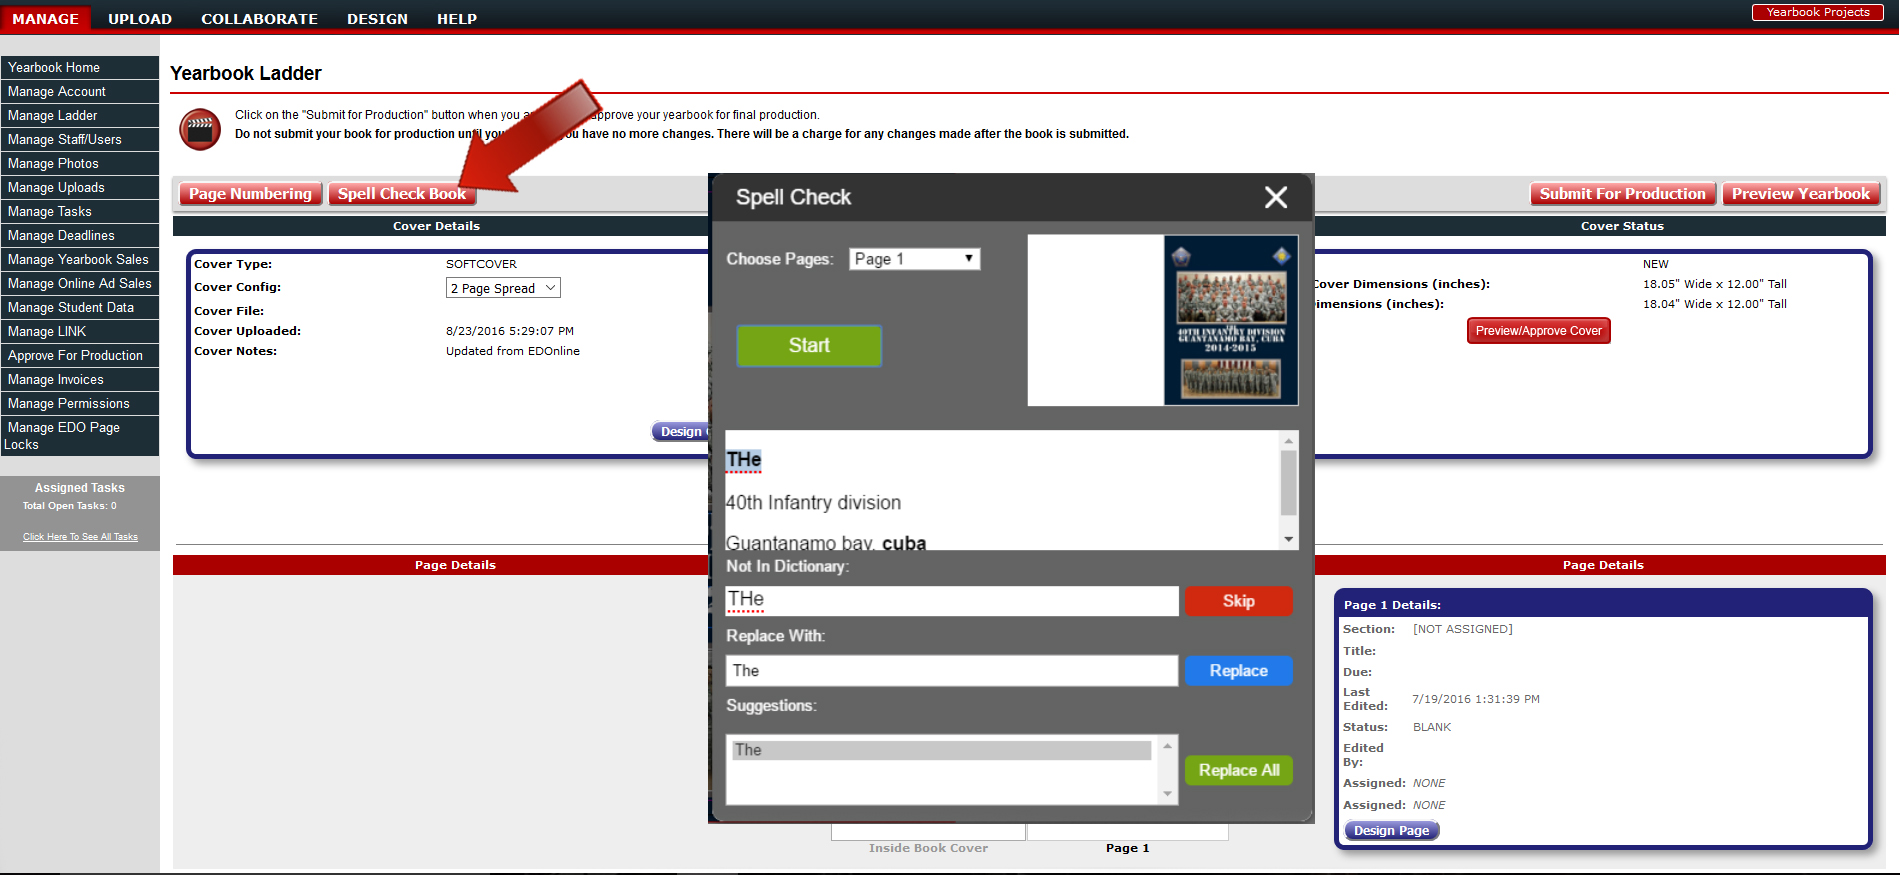
- You can now spell check your entire book! Click on the "Spell Check Book" button on your yearbook ladder.
Ladder Organisation Features (Note: ONLY Admins and users with permission can assign pages and edit details on the yearbook ladder.)
Each page has its own "Page Details". The Page Details area includes functions for the following:
- Assign a Section to current page
- Opening
- Dividers
- Student Life
- Academics
- People Pages
- Sports
- Clubs & Organizations
- Ads
- Autographs
- Closing
- Other

How to generate a PDF of your pages
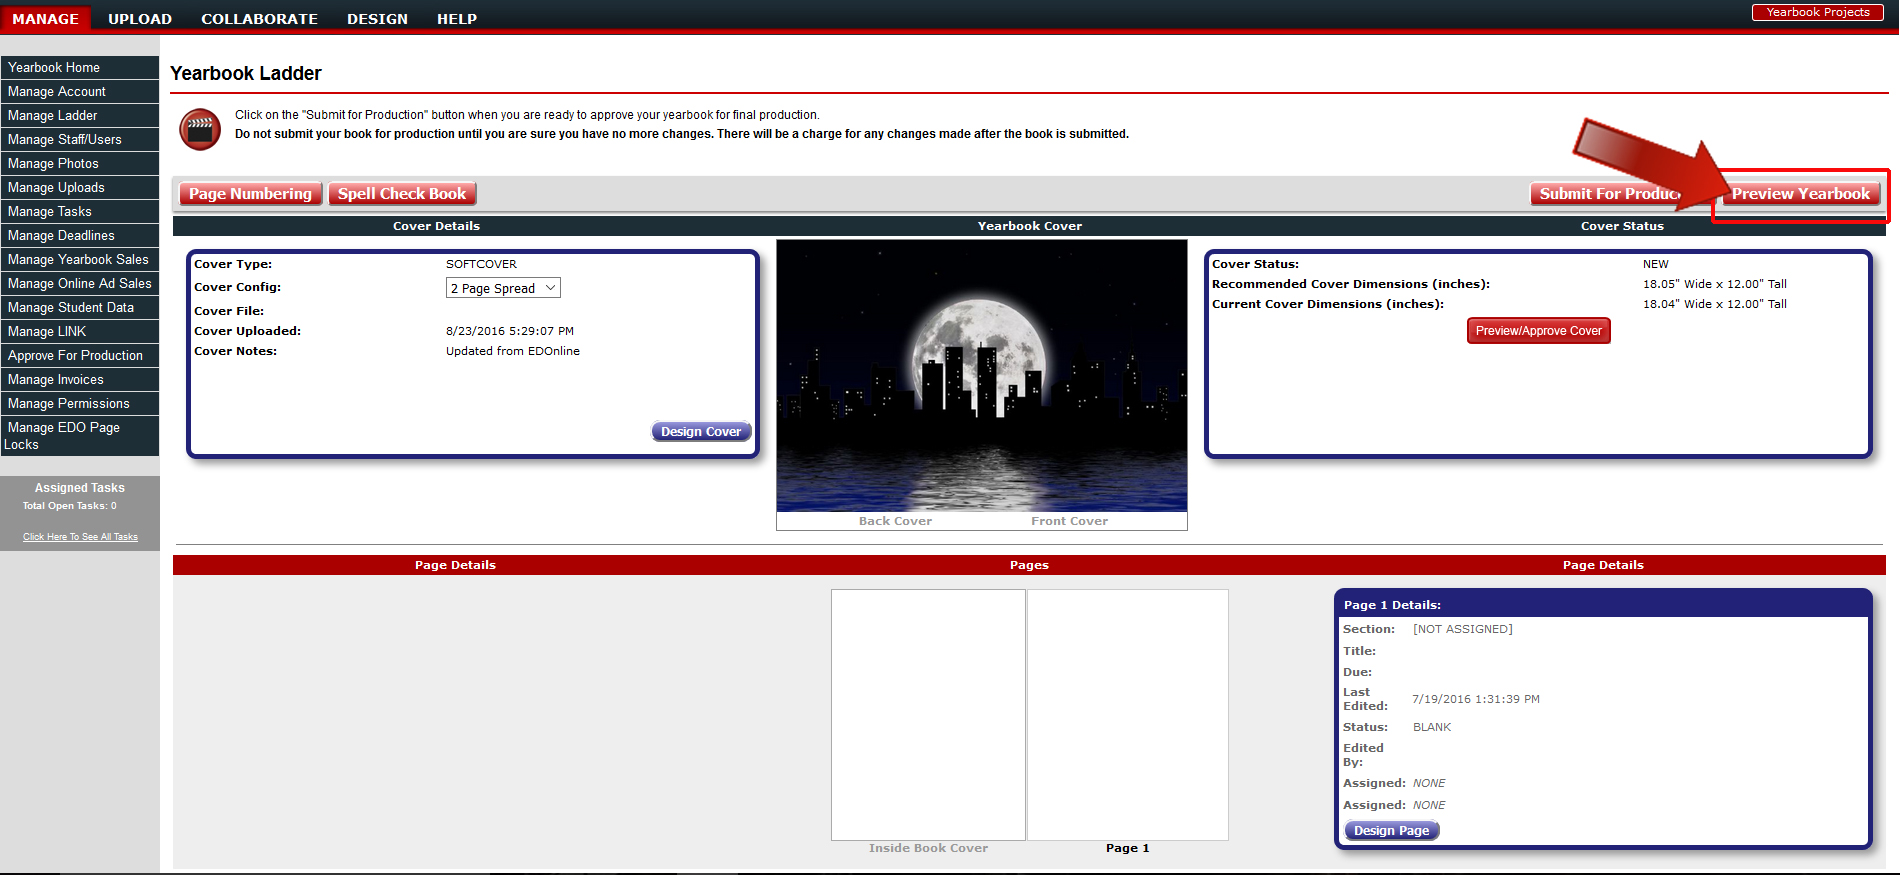
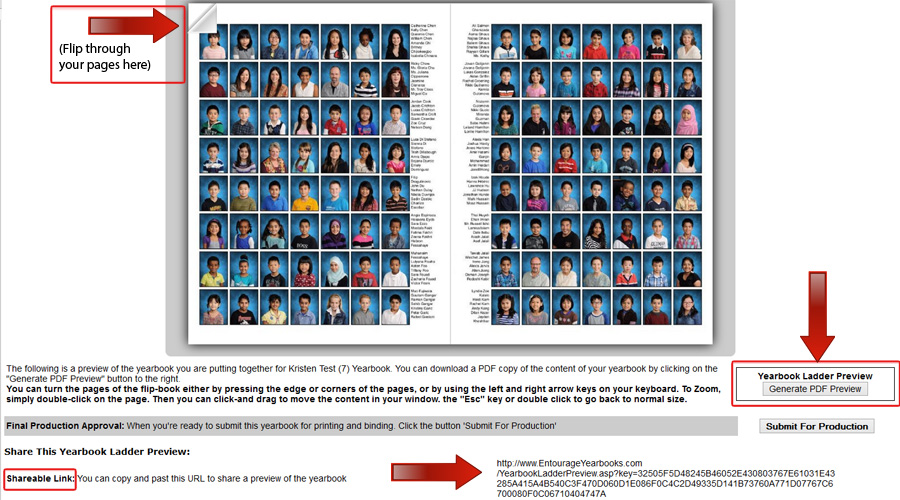
- While on your yearbook ladder, at the top right of the page you will see a button that says "Preview yearbook". Click on this button.
- On the bottom right of the page, click on the grey button that says "Generate PDF preview".
- The PDF will generate, and you will be able to print your pages.
To preview your pages without generating a PDF or having to download anything, you can flip through the pages while you are in "Preview yearbook". There is also a shareable link which allows you to share your yearbook pages with others who are not involved in the yearbook making process.
Other Features Include
- Define the Page Title to keep track of what content this page will contain.
- Set a due date for when the current page design should be completed by.
- Assign pages to website staff members, so that your class or team can keep track of which pages they are responsible for.
- Add notes for your students or members of your yearbook staff as they work on their pages, a great place to provide feedback on their design.
- You can keep track of the progress by viewing the updates of individual pages.
- Update the status of the pages: Blank Page, Page Placed, Update Required, Incomplete, or Page Approved.
If you are an EDOnline user, you will see a blue button that says "Design Page". This button will take you to the corresponding page in the designer to continue edits.

Finalising Yearbook Ladder for Production
When you are ready to finalise your yearbook ladder for final production do the following directly from your ladder:
- Click on the red button "Submit for Production."
- Follow the steps to approve your pages, cover, delivery information, specs, and final payment method. (Note: Any link that reads "NOT SET - CLICK HERE TO APPROVE" needs to be addressed.)
- Make sure any final outstanding payments have been made. [FINAL PAYMENT OUTSTANDING - CLICK HERE TO SUBMIT FINAL PAYMENT]
- Click on any link that still needs approval before going to the "YEARBOOK ACCOUNT COMPLETION & FILE STORAGE" section.
- Decide whether you wish to save your yearbook in our Vault ready for use in next year's yearbook and name the file.
- Review the final questions, add any additional comments/notes and fill in you name, phone number and email address to approve for final production.
- Click the "APPROVE FOR FINAL PRODUCTION" button.
If you have any questions about this process, please do not hesitate to call Support; we'll be happy to assist you.
Note: Once the production approval form is submitted, your books will begin the production process and cannot be edited any further.
You do have the option to un-approve your yearbook if you need to make a change. This would require a fee and a delay in your delivery date.
Assigning Pages To Your Yearbook Ladder And Approving For Production (Fotofusion, InDesign, Publisher users)
For all Fotofusion, InDesign, or other software users; once you have completed and are satisfied with the design of your yearbook you are ready to upload your pages to your ladder. Follow these steps to go on to approve your pages for final production.
- Click the "Assign Page" link located on each individual page on the Yearbook Ladder.
- A pop-up will appear that provides you with the list of your files from the Manage Uploads page.
- Click on the file name that contains the page you want to assign to the ladder.
- Previews of each page in that file will appear, click "Select Page" for the page that you want to assign.
- Your individual page will be assigned to the ladder and you can continue assigning pages.
- Once you have finished assigning your pages click the "Submit for Production" button.
Follow the previous steps from "Finalising Yearbook Ladder for Production:" to complete submission.
Related Articles
What Content Should I Include in the Yearbook?
If You Have an Existing Yearbook Set aside some time early on to figure out how you can improve on the previous year: Have any of the events/activities changed from the previous year? Was there any feedback from staff/students/parents about the ...Yearbook Planning
Keeping track of what stage everything is at is a huge task and one that is easier if it is properly planned. Consider the following: If you can, gather a team of student helpers or staff who can assist you throughout the year with taking photos, ...Page Numbering
Adding numbers to your pages is no longer frustrating or time consuming. Any Admin/Yearbook Advisor who has access to the Yearbook Ladder can conveniently add numbers to their pages using simple to advanced options. Go to your account's yearbook ...What's a Typical Yearbook Timeline?
Typically, you will sign up for yearbook with YOLO around March/April. Then begins the initial yearbook planning from April to June - organising content and page plans, sending YOLO the design brief and deciding on a design to use. The second stage ...Made by Me - Quick Start Guide
Login to the Website Follow these simple steps to log in to your website: Go to http://yearbooks.spacificnz.com/. You will be taken to the Home Page for all users to gain access to your yearbook site. Click on the link to "Find Your School" Enter the ...