Templates/Custom/Bookmarking
We offer vast galleries of Templates and Backgrounds to choose from. You can bookmark templates and backgrounds or save a designed page as a template. Follow these steps to insert a template.
Insert A Template
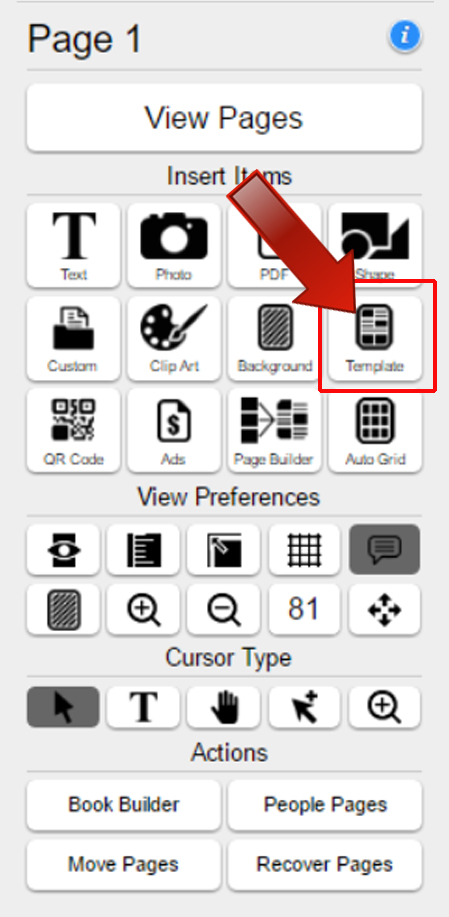
- Inside the page designer on the left, click on the "Insert Template" button. (Note: You must have a page selected ready to design.)
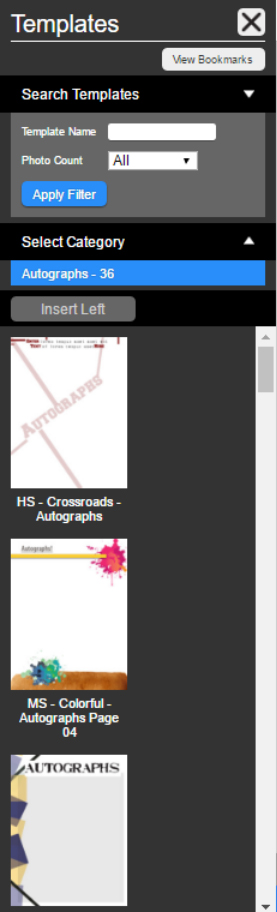
- Browse the categories on the left, select a category to view the corresponding templates as shown below.
- Select the template that you would like to use, then click either “Insert On Right Page or Insert On Left Page." (Note: If you are on a single page click "Insert On Page.")
- Your template will place onto the page that you had requested and you can continue to customise it.
Note: If there is content already on your page and you wish to drop your new template onto it, the designer will ask if you wish to replace the existing content or drop the template directly on top.
 Now you can search for templates using key words. Just type in a keyword, such as, 'class of' and you will be shown multiple templates according to that keyword!
Note: This keyword search option works for backgrounds and clipart as well!
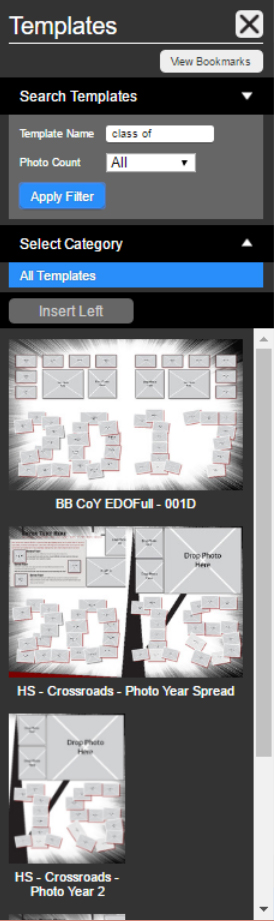 You can still select any of our individual categories for a template. But, for faster results use the keyword search!
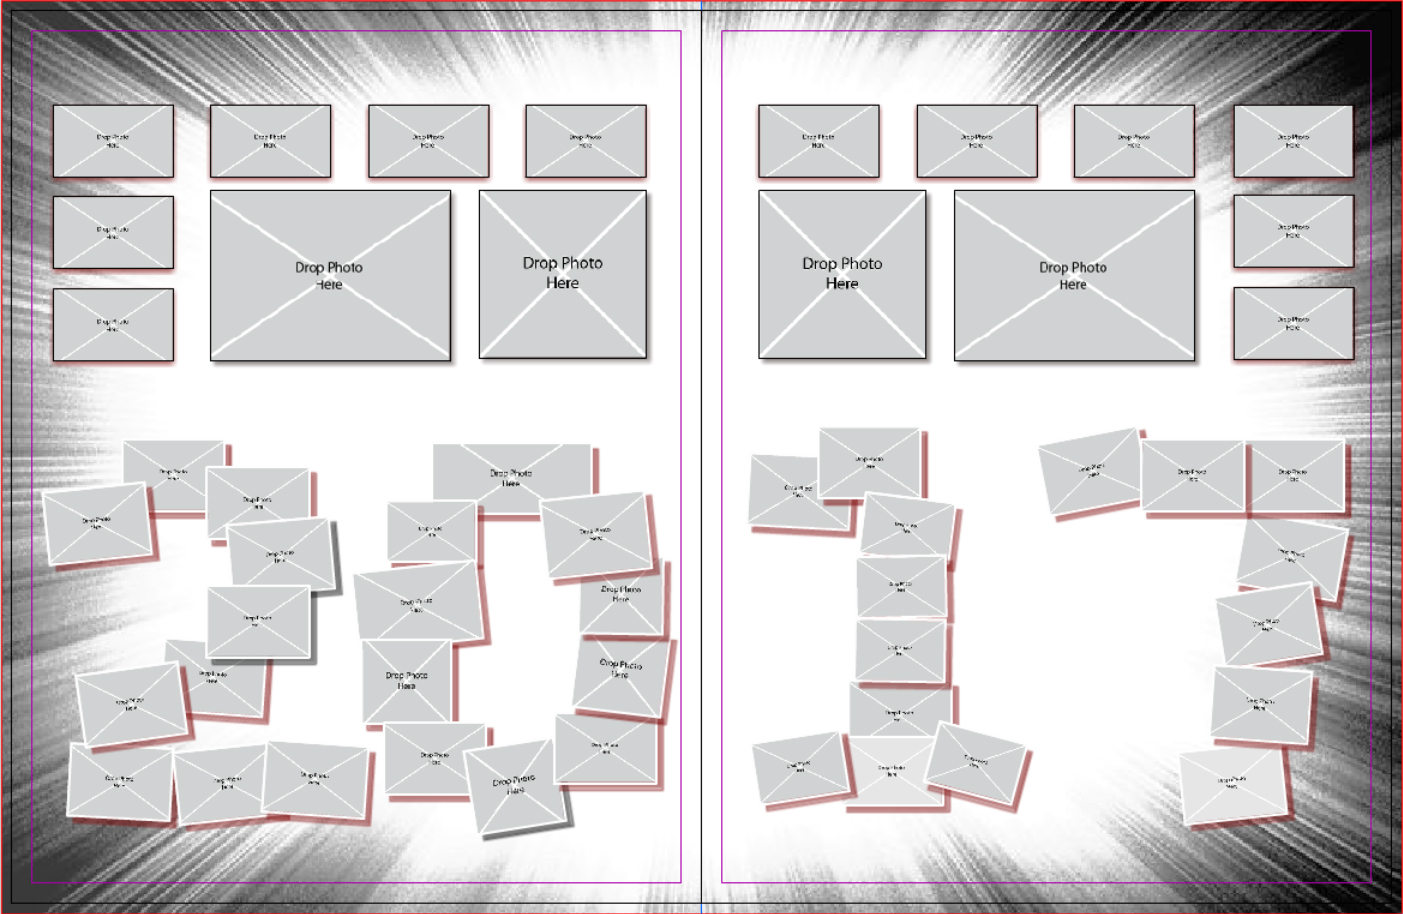
Creating Custom Templates
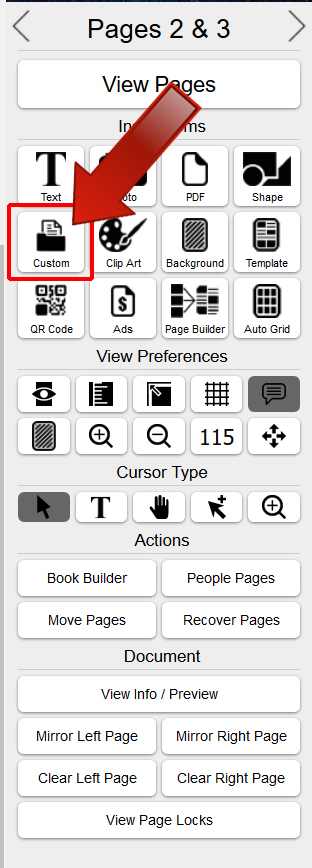
You now can organise and create your custom templates with the new Custom Template features. Begin by clicking on the "Custom template" button from your "Insert Items" menu options. A popup will appear which is where you will locate all your created custom templates.
Click on the "New Template" button to begin
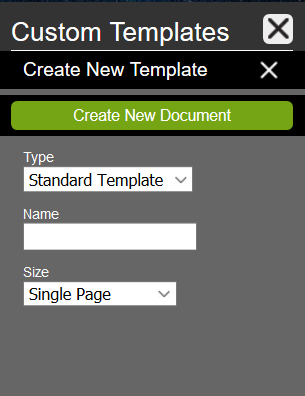
First: Choose a type of template you wish to create:
- Standard Template
- Master Page
- People Page
Second: Name your template.
Third: Choose from the drop down menu the size of template you wish to create:
- Single Page
- 2 Page Spread
- Cover Document
Last: Click the "Create New Document" button.
Note: When you create and use your custom template on your pages; if you need to edit them you can still do so without having to replace your custom template on your pages. Click on the "Custom Template" button and select the template you wish to edit. Click the "Edit" button which will appear when you hover your mouse over your custom template. This is can be done with Master Templates! Once you have completed your edits of your Master template your changes will update automatically on your pages where you have the Master Template placed. Make sure your changes reflect in your ladder preview.
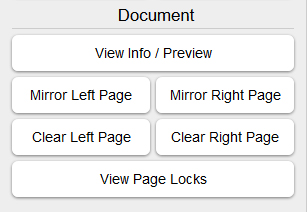
Mirror Templates
A new feature has been added to allow you to mirror your content on the opposite page. You can mirror your left or right page by clicking on the buttons which can be found in the "Document" section on the left side of your workstation; just below the "Actions" buttons.
Bookmarking A Template - EDOnline 6.5
There's now a new way you can bookmark a template without having to leave the page designer. While working on your yearbook project if you come across a template you like and you wish to see how others have used the template; then follow these steps:
- From the EDOnline Page Designer click on the "Insert Template" menu option.
- Click on a template category to view the templates within the category.
- Hover your mouse over a template and you will see a magnifying glass icon appear. Click on the icon to view the template details.
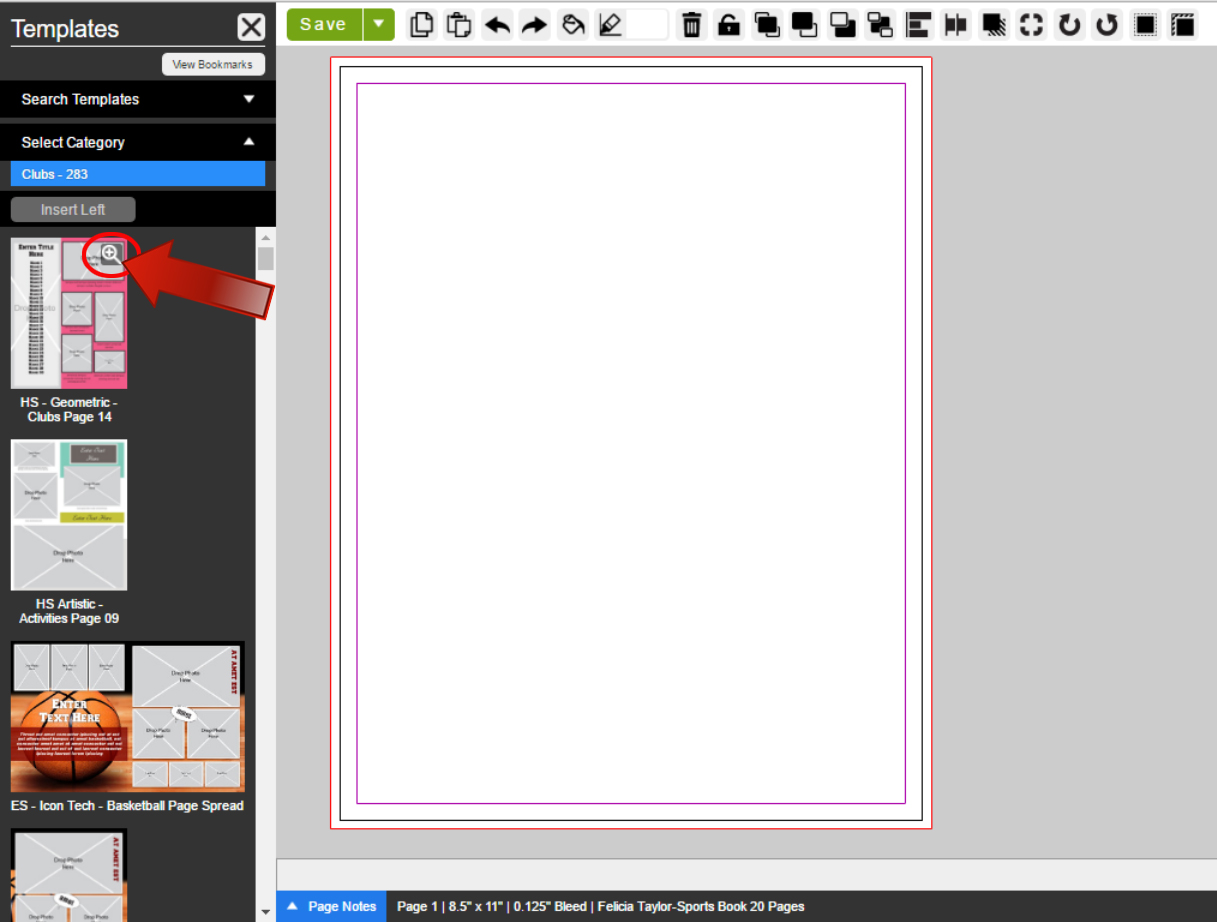
- A popup will appear with the details of the template selected: (Name of the template, Labels - Category list where the template can be found.)
- Below the template you will see, at least, five previews of how others have used the template. If you like the template you can choose to bookmark it by clicking on the check box; "Bookmark Template".
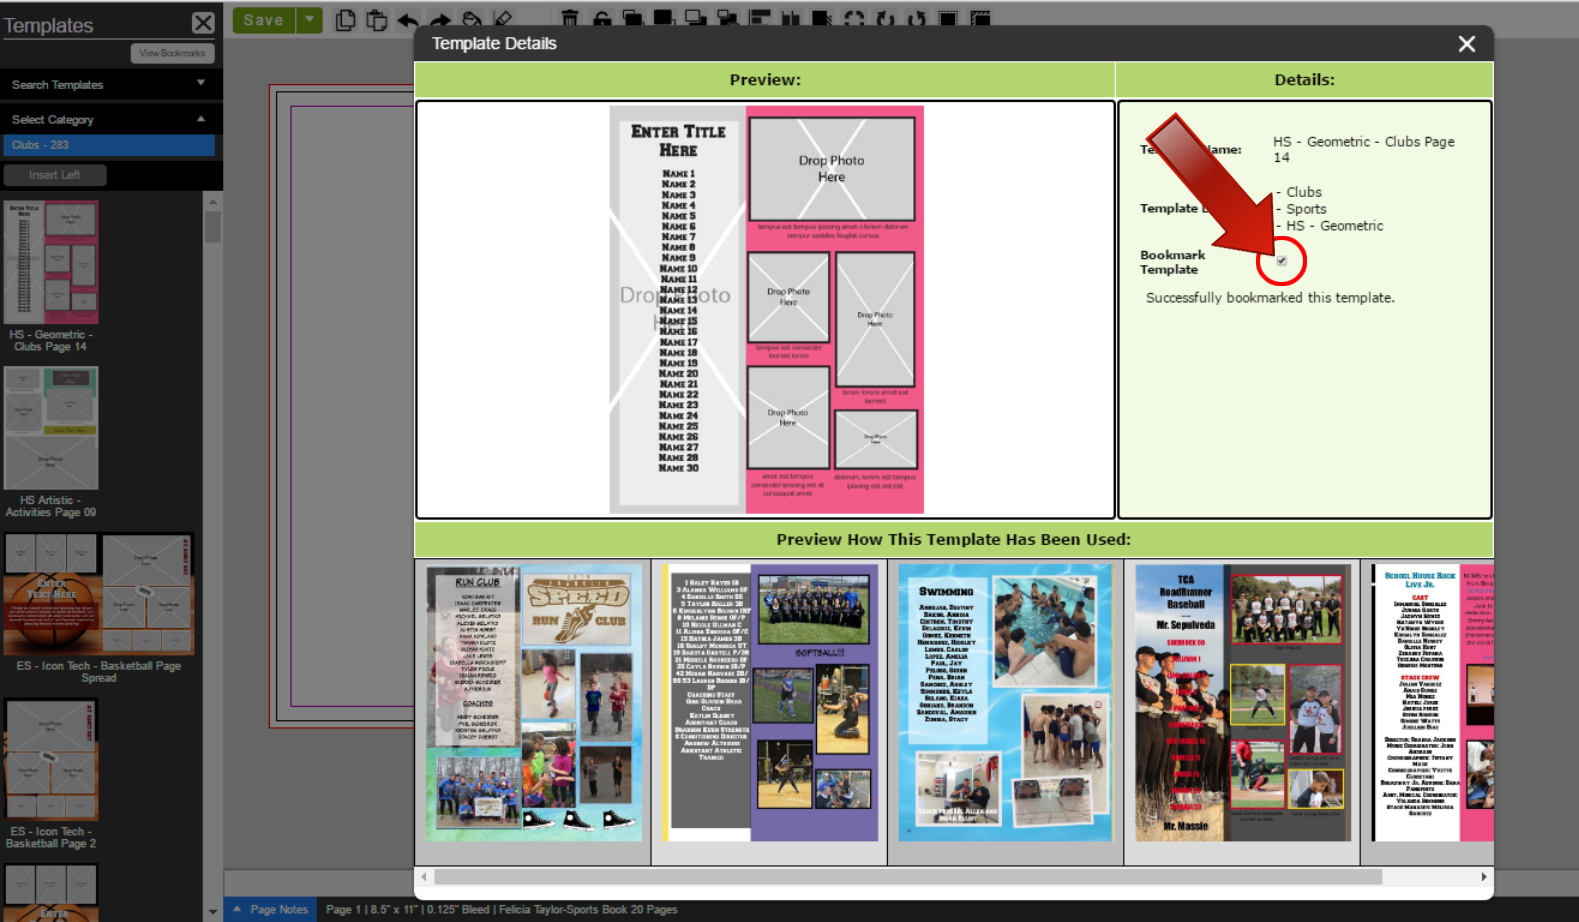
Note: If there aren't any previews available for the template it is due to the fact the template hasn't been used yet. Inspire others by being the first to use the template. Your template preview can display, if chosen, once you approve your book for production.
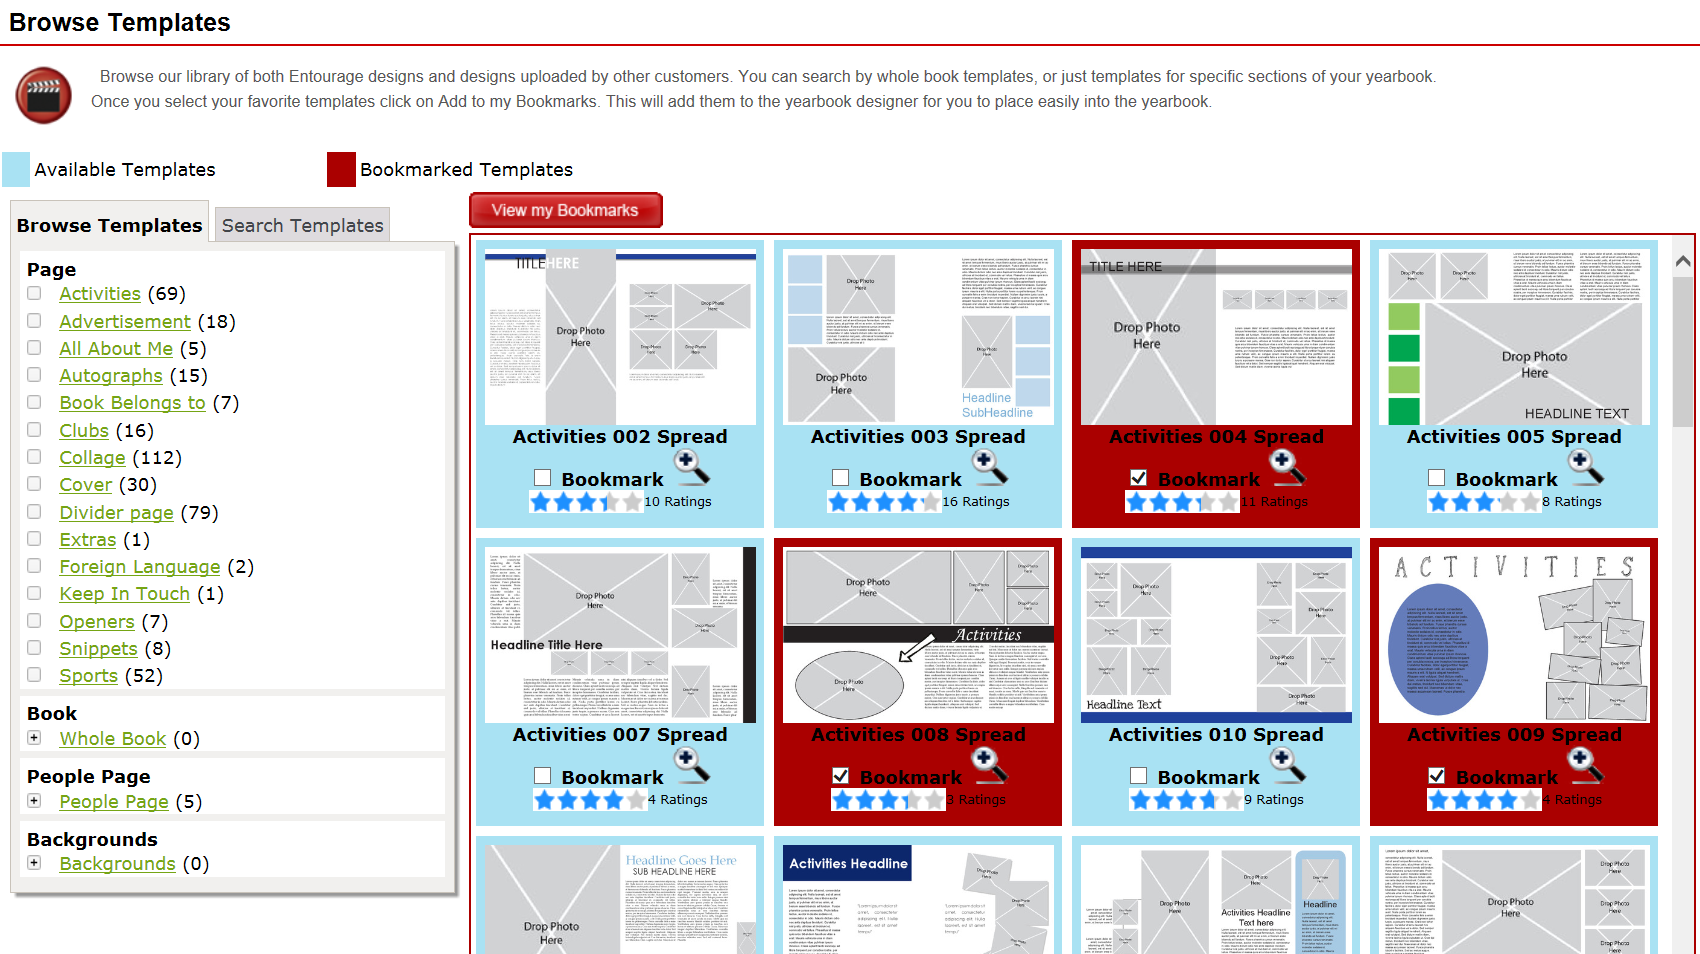
Collaborate Menu Option - Bookmarking A Template
1. In the Main Menu go to the Collaborate Tab and click "Explore."
2. Click the "Templates" block to view the template gallery.
3. In this view you can browse templates by categories:
- Page - Individually pre-designed templates to aid you in designing your pages with many different categories to choose from.
- Book - Selection of "Whole Book" templates based upon a particular theme.
- People Pages - Pre-designed student portrait pages.
- Backgrounds - Pre-designed full and single page backgrounds for a unique look and feel.
4. Select a category of templates.
5. Click the square to select the template to bookmark. (Note: To get a closer view of the template click on the magnifier. Click on the X to close the quick preview.)
6. Once you are satisfied with your selection click "View My Bookmarks" button.
7. Navigate back to the page designer to access your bookmarks. (Note: Click on the "Insert a Template" button and click the "Bookmarks" tab to use your templates.)
Note: You can also search for a particular templates by:
- Whole Book - Templates are divided by school level and theme.
- School Type - Choose your schools grade level
- Theme/Selection
- Order By - Choose from the most popular or highest rated.
Along with bookmarking templates you can rate your favorite and share them with the Yearbook Community!
Related Articles
Save as Template and Editing Saved Templates
The "Save As Template" feature can be a life saving aid when creating your yearbook pages quickly and efficiently. If you have a favourite template or background you'd like to save for later use on another page the "Save As Template" function can ...How do I add my generated People Page templates to my page design?
Click on the Templates insert button, then the tab titled 'People Pages', select the template that you want to place and decide whether to place on the left or right side page.Student portrait photos (People Pages)
Getting Started From the page designer on the bottom left panel click on the button “People Pages” For each step there are quick video tutorials to help you through the stages in creating your People Pages. We recommend you preview each video if you ...Admin Tools
Administrators have full access to all of the features and functions to the yearbook website. You're in the driver's seat leading your yearbook staff in designing a yearbook that you and your school can be proud of. With the many tools to help you ...Adding Shape Elements
Adding shapes to your pages can be fun and easy. You can also customise your shapes as well with our custom tool "Edit Path" which is located at the top of your workstation. This tool will appear once you have placed the custom shape onto your ...